Friday 16 September 2011

Peking Duck


This traditional Peking duck recipe comes from acclaimed opera singer Hao Jian Tian and Martha Liao, his wife. Also try: Martha Liao's Spring Rolls

The Martha Stewart Show, February 2010
  • Yield Serves 4

Ingredients

  • 1 (4-to-5-pound) fresh or frozen (thawed) Long Island duck
  • 7 scallions, trimmed
  • 2 (1/2-inch thick) slices fresh ginger
  • 1/4 cup honey
  • 2 tablespoons cornstarch
  • 3 tablespoons Shao Hsing (Chinese cooking wine) or dry sherry
  • 1 tablespoon white vinegar
  • 12 to 15 frozen steamed rolls
  • Sweet black bean sauce or hoisin sauce, for serving

Directions

  1. In a very cool room, tie duck wings together using kitchen twine. In a cool room, hang duck from kitchen twine over a large bowl overnight, about 8 hours.
  2. Fill a large pot with 4 cups water, 2 scallions, ginger, and honey; cover and bring to a boil. In a medium bowl, whisk together cornstarch and 1 cup cold water until well combined. Whisk cornstarch mixture into boiling water mixture until it is the consistency of a light gravy. Stir in wine and vinegar; remove sauce from heat.
  3. Add duck to pot and spoon over sauce, for 3 to 5 minutes, until very well coated. Remove from sauce and hang duck again, in a cool room, over a large bowl for 4 hours.
  4. Preheat oven to 300 degrees.
  5. Fill the drip tray of a vertical poultry roaster with water; set in a roasting pan. Place duck on vertical roaster and transfer to oven. Roast until duck is golden and an instant-read thermometer inserted into the thickest part of the thigh (but not touching the bone) reaches 175 degrees. Take care with duck grease as you roast; if too much begins to accumulate in roasting pan, ladle into a disposable heatproof container as the duck cooks and discard.
  6. Meanwhile, prepare frozen steamed rolls according to package directions. Quarter white parts of remaining 5 scallions and cut into 2-inch pieces, reserving green parts for another use.
  7. Thinly slice duck and serve with steamed rolls, scallions, and sweet bean or hoisin sauce.

Monday 12 September 2011

Fish and Chips

It’s National Fish & Chips Day today and here is a great Fish & Chips recipe that is lighter, healthier and has a modern twist!
FOR THE CHIPS
  • 800g unpeeled, even-size Maris Piper or King Edward potatoes
  • 2 tbsp olive oil
FOR THE PEAS
  • 300g frozen garden peas
  • 1 tbsp olive oil
  • 2 tsp lemon juice
FOR THE FISH
  • 650g (approx) skinless haddock , hake or cod fillet from a sustainable source, cut into 4 equal-size pieces
  • 50g self-raising flour , plus 1 tbsp
  • 50g cornflour
  • 1 egg white
  • 125ml ice-cold sparkling water
  • 1 lemon , cut into wedges
  • 600ml sunflower oil , for frying
Method:
  1. Scrub the potatoes, cut into 1.5cm thick lengthways slices, then cut each slice into 1.5cm thick chips. Tip the chips into a large saucepan, pour in enough water to just cover, bring to the boil, then lower the heat and gently simmer for 4 mins only. Drain, tip onto a clean tea towel, pat dry, then leave to cool. Can be done 1-2 hrs ahead. Heat oven to 220C/fan 200C/gas 7. Put a large shallow non-stick roasting tray in the oven with 1 tbsp olive oil and heat for 10 mins.
  2. Transfer the chips to a bowl and toss in the remaining oil using your hands. Tip out in a single layer onto the hot roasting tin. Bake for 10 mins, then turn them over. Bake 5 more mins, then turn again. Bake for a final 5-8 mins until crisp. Drain on paper towels.
  3. While the chips are in the oven, cook the peas in boiling water for 4 mins. Drain, then tip into the pan and lightly crush with the back of a fork. Mix in the oil, lemon juice and freshly grated pepper. Cover and set aside.
  4. The fish can also be cooked while the chips are in the oven. Pat the fillets dry with paper towels. Put the 1 tbsp of flour on a plate and use to coat each fillet, patting off the excess. Pour the oil for frying into a heavy, medium non-stick wok or wokshaped pan. Heat to 200C (use a thermometer so you can check the oil stays at that temperature). Mix 50g flour, cornflour, a pinch of salt and some pepper. Lightly whisk the egg white with a balloon whisk until frothy and bubbly, but not too stiff. Pour the water into the flour mix, gently and briefly whisking as you go. The batter shouldn’t be completely smooth. Add the egg white, then lightly whisk in just to mix. Try and keep as many bubbles as you can so the batter stays light. Cooking two pieces of fish at a time, dip them in the batter to coat, let some of it drip off, then lower into the hot oil using a slotted spoon. Fry for 5-6 mins, making sure the oil stays at 200C and turning the fish over halfway through so it is golden all over. Lift out with a slotted spoon, drain on kitchen paper. Check the oil is back up to 200C, then repeat with remaining fish. Reheat the peas and serve with the fish, chips and lemon wedges.

Saturday 10 September 2011

Sze Chuan Beef

It looks a copy can be purchased for the exorbitant price of $0.98 from Amazon.  I picked up my copy from a used-book shop for a similar price, maybe all of $2.

Anyway, this recipe was quick to make and had few ingredients AND I was able to use my new $8 wok that I mentioned in a prior post.

Although the recipe was for 4 servings, I cut some in half since just the DW and I were eating.  I will note what was halved, and what was full amount so you can make your own decisions.

1/2 pound beef fillet (halved)
1 TBS olive oil (for stir fry, who measures this out anyway?)
1 garlic clove (full)
1 cm piece freshly ground ginger root (full, we freeze chunks of ginger root for later use; still retains its pungency)
2 green onions, chopped (halved)
1 TBS hoisin sauce (full)
1 TSP Szechuan peppercorns (full; I can never find this so I used black peppercorns)
4 oz. vegetable chow-chow (??, so I used some freshly-cut green beans)
1 TSP sugar (full)

1.  Trim the fat and silver skin from the beef.  Cut into thin slices.

2.  Prepare the peppercorns by dry-roasting in your brand-new $8 wok for 1 minute and then grinding into powder.  This releases the fragrance unlike any other method.

3.  Heat oil in your wok and stir-fry beef, garlic, ginger and green onions for 1 minute.

4.  Add remaining ingredients and stir-fry 3 to 4 minutes until the beef is just cooked through.

5.  Serve with rice.  I use brown rice, loving the slightly browned (caramelized) bits from the bottom of the rice cooker.

Szechuan Beef Ingredients (green beans are in-season)


Yup, Hoisin Sauce


The hoisin sauce is the most interesting thing about this recipe.  It is basically a Chinese barbecue sauce and can be used in many recipes as an added flavour.  The sauce contains soybean paste, garlic, chillies, and other spices, and usually contains some sugar and vinegar.

Browning the beef, throwing in the seasonal veggies

A lump of Hoisin sauce (~1 TBS)

Ready to Eat (notice the small helping)

Recipes like this are so easy to prepare that I don't know why more people don't cook at home.

Friday 9 September 2011

Chicken Masala

This is definitely one of my all time favorite Indian dish. I love hunting for Banana Leaf Rice shops and have a taste of their Chicken Masala in order to perfect mine. At the end of the day there will always be a few variation but all still taste heavenly. One of the main differences I guess is the use of yogurt as an ingredient. Some Chicken Masala I've tasted uses it and some does not. Anyways this is a version which doesn't which makes it a little on the dry side. Hope you guys enjoy it!


Ingredients:
1 whole Chicken - cut into small pieces.
2 medium Onions - chopped.
5-6 Tomatoes - cut.
1 1/2 tsp. Salt
1 1/2 tsp. Red Chili Powder
1 tbsp. Garlic - crushed
1 tbsp. Ginger - crushed

Garnishing
Fresh Coriander Leaves - chopped
4-5 Green Chili
2 tbsp. Coriander Seeds
1 tsp. Kalonji
1/2 cup Cooking Oil


Directions:
1. In a large saucepan over medium heat, fry onions till golden brown.
2. Now add the chicken, and stir.
3. Add the remaining ingredients and cook over medium flame.
4. When the oil separates from the chicken cook for additional 15 minutes, and keep stirring.
5. When the meat is cooked, reduce heat and cook for an additional 5 minutes.
6. Garnish with fresh coriander and green chili.
7. Serve with rice, roti or naan.

Thursday 8 September 2011

Cheese Pizza

Here is one simple recipe to make a basic Cheese Pizza. So let's try and make Cheese Pizza!


Cheese Pizza

Ingredients:

  • 1 cup lukewarm water
  • 1/4 ounce dry yeast
  • teaspoon sugar
  • cups bread flour
  • 1/2 teaspoon salt
  • tablespoon olive oil
  • 1/2 cup tomato puree
  • tablespoons tomato paste
  • 1 garlic clove, minced
  • tablespoon fresh basil, chopped
  • ounces Fresh mozarella cheese(grilled and sliced)

Procedure:

  • Making a Dough. (Follow this link to learn easy steps of making Pizza Dough)
  • Making Sauce:
  • Mix tomato puree, tomato paste, minced garlic, and basil.
  • Spread a layer onto prepared pizza dough.
  • Add grilled mozarella cheese onto the layer of sauce.
  • Add another layer of sauce.
  • Now top with sliced Mozarella Cheese
  • Finally bake it at 500°F for 10-12 minutes.

Wednesday 7 September 2011

Meat Ball Spaghetti Bolognese


This is what I cooked for lunch in line with our "no rice" Sunday. It's nothing new, but it still remains as our favorite dish since I started to cook. :) I used too add different ingredients to it. For example, potato, fresh brown mushroom or white button mushroom. But today, I just stick to the original taste as I don't have any fresh mushroom in the fridge. Also, I back to Maggie premix sauce rather than Prego, cuz I found that it is thicker.


Hmm...got one suggestion from hubby that may be I should try to cook seafood spaghetti next time. Ok, provided he sponsors fresh raw seafood then. Haha...

Meat Ball Spaghetti Bolognese
Serves 2
Ingredients:

200 gm of egg spaghetti
200gm minced pork meat (you can use either beef, pork or chicken)
1 teaspoon of salt
a small bowl of Canola oil & some extra virginn olive oil

A) Marinate ingredients:

2 tablespoon of light soy sauce
2 tablespoon of chopped shallots
1 egg
Dash of white pepper

B) Sauce

1 packet of Maggie bolognese sauce mix.
Remark: the sauce mix is the serving for 4 person. However, I find it just enough for 2, as I like more sauce.
1 1/2 cup of water
half onion, sliced
1 tablespoon of chopped garlic
2 tbsp ketchup
1 tbsp light soy sauce

Instructions:

1. Marinate minced pork with A). Let it stand for 30 minutes to 1 hour.

2. Heat some Canola oil in a wok. Scoop minced pork into balls using a teaspoon and fry in the wok. Keep the fire to medium.


3. Remove fried meat balls and set aside.


4. Bring a pot of water to boil. Add 1 teaspoon of salt to the boiling water. Add spaghetti and cook for 8 minutes (refer to instruction on the packing) and drain.


5. Heat 2 tablespoon of extra virgin olive oil in a wok. Fry sliced onion and chopped garlic until fragrant.

6. Pour in water, and add the Maggie mix. Stir and bring to boil.

7. Reduce heat, partially cover and simmer for 15 minutes until the sauce thickens.

8. On a plate, add cooked spaghetti, and put few meat balls on top.

9. Scoop the sauce and pour on top of the spaghetti.

Taken from Little Inbox Recipe

Tuesday 6 September 2011

Ginger chicken

This is one of our must order dishes at our local Chinese. Some of you might be more familiar with the mud crab or lobster version, this is pretty delicious if you only want to spend a fraction of the other 2 versions. This is the first attempt and I must say it tasted just like what I remember. If you want to spend a bit more on a mud crab or lobster, the method is the same.
P.S The photos are horrendous so I hope it wouldn't stop you from trying. I will certainly be making this again, photos will be updated then.

Serves 3
you'll need;
3/4 of a free range chicken, chopped into pieces
10 cm piece of ginger, sliced
3 garlic cloves, chopped
1/2 onion, sliced
4 spring onions, cut into 2" lengths
4 tbs of oyster sauce
dash of sesame oil
dash of soy
dash of Chinese cooking wine
dash of white pepper
2 cups of chicken stock
corn flour solution
fresh egg noodles (1.5/person)*
*Cook noodles with plenty of hot water for 15 seconds, remove and rinse in a big pot of cold water. Bring the water back to a rapid boil, return noodles and cook til al dente.


Prepare the vegetables.

Fry chicken pieces til golden.

Saute garlic and ginger til fragrant, add in the chicken and continue to cook for a minute on high heat.

Add seasonings and stock, bring it to a boil then chuck in the onions and continue to cook for a further minute. Check for seasonings and thicken the sauce with a little corn flour solution. Pour the everything over the awaiting cooked noodles.

Serve immediately with cut chillies and soy or Cantonese style chili oil. 

Sunday 4 September 2011

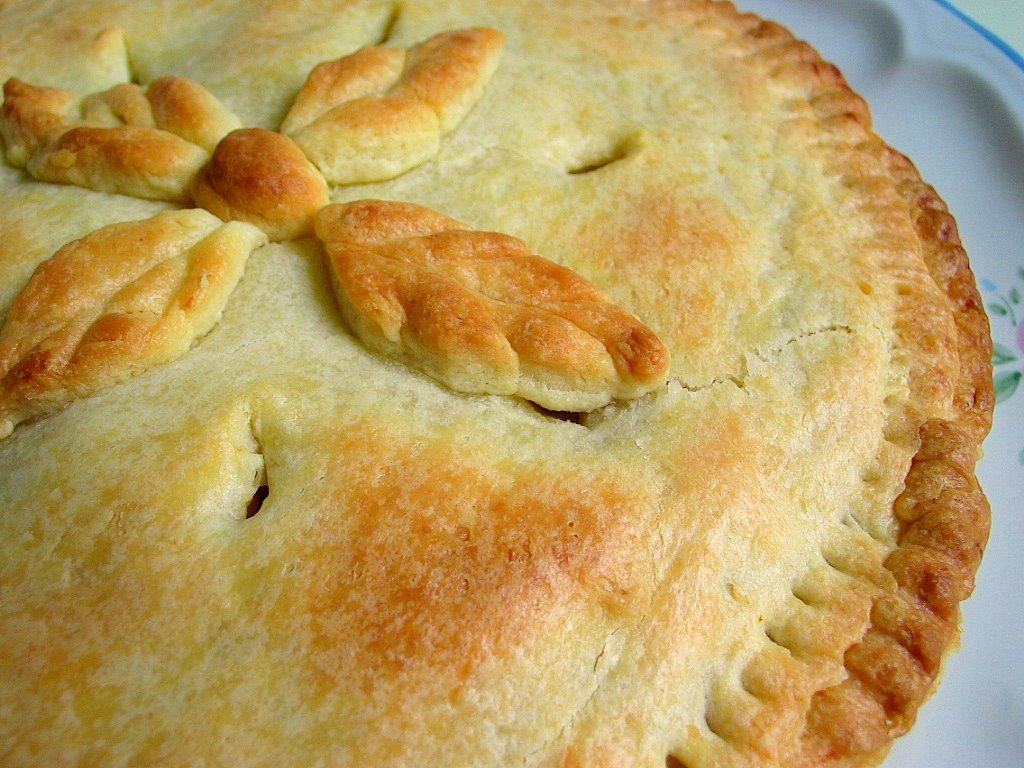
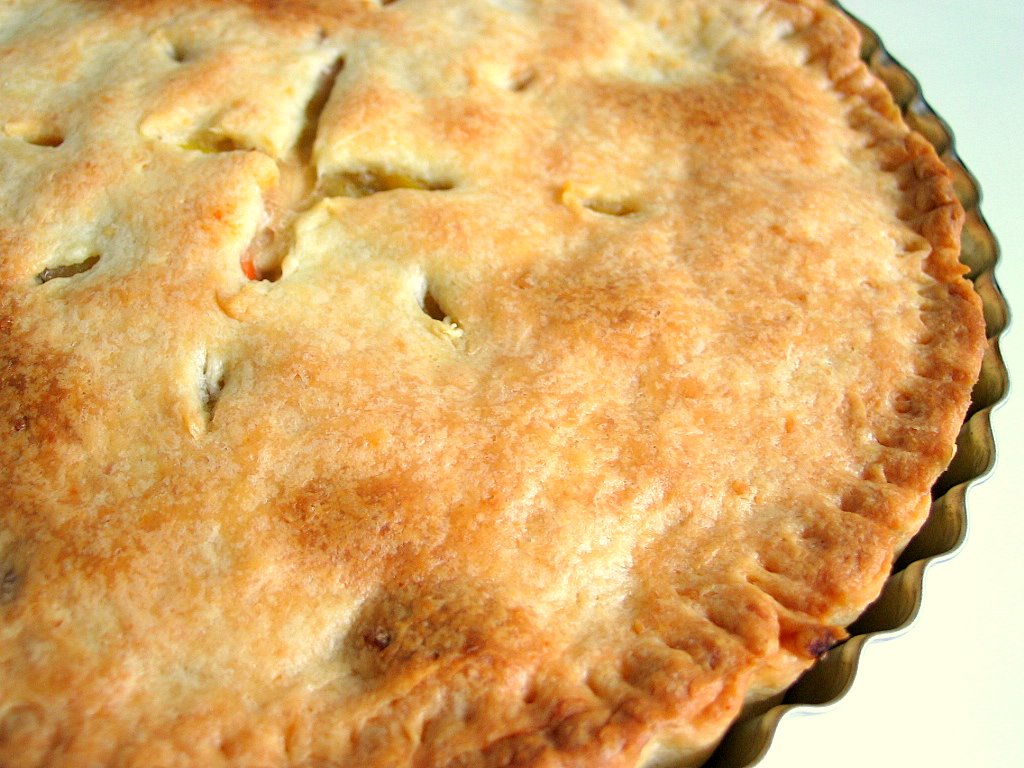
Chicken Pie

Made this chicken pie for lunch today. This is my very first attempt at making a pie. I have never thought I would be able to make a savoury pie, as I can't really cook I always stay away from any bakes that require some form of cooking.

Just last week, my cyberfriend, VB, sent me photos of her lovely chicken pie. She followed the recipe posted by Baking Mum. Instead of making into small individual pies, she made it into a big one. The pie crust was a beautiful golden brown..and it looked very flaky and yummy! I was so inspired with her beautiful pie that I wanted to make one right away :D
I followed the recipe posted by Peony of My Culinary Journal, who has adapted the same recipe from Baking Mum. Like VB, I made mine into big ones...since I do not have a big enough pie pan, I made mine into two medium sized pies...using a 20cm and a 18cm tart pan. I didn't brush on any egg wash on the crust as I do not like the glossy effect after baking.


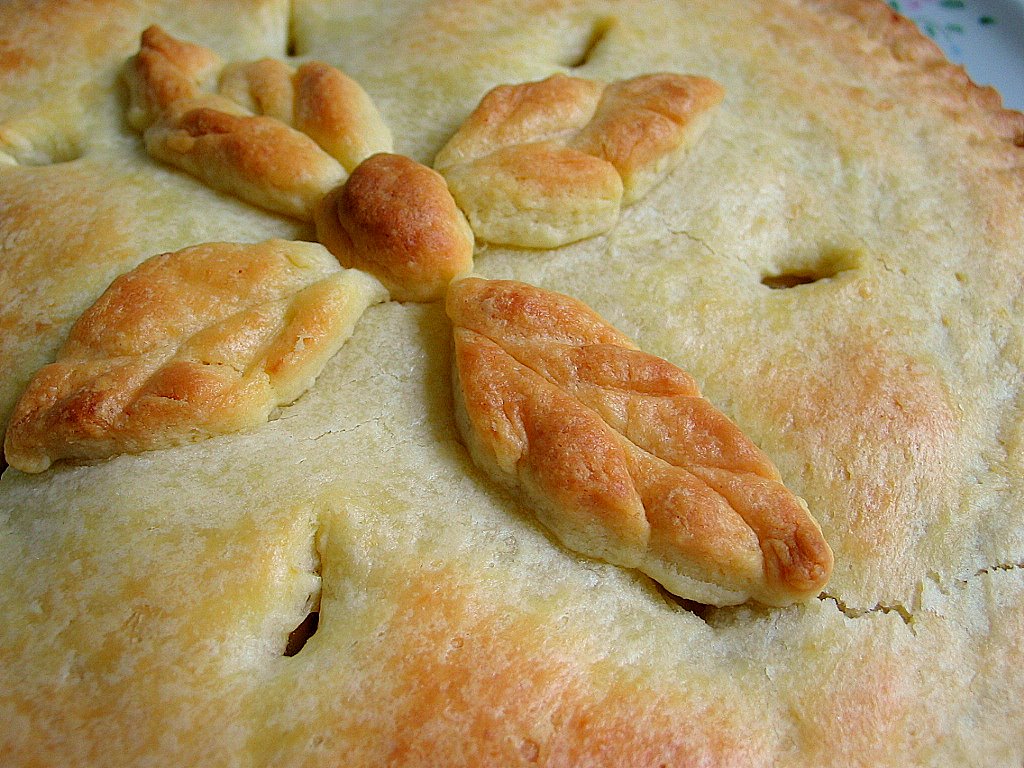
From the many cookbooks that I have borrowed, I have seen beautiful photos of pies decorated with pretty trimmings and decorative edges. Since I do not have any experience to come up with those intricate trimmings, I simply pressed a fork around the edge of the crust to make it more presentable. With a small piece of dough, I cut out the 'leaves" with a knife since I do not have any nice cookie cutters to do the job. The veins are marked using the back of the knife. I simply place them on top of the crust and cut a few slits on the top before baking. As the dough was rather soft to work with, the leaves were not of the same size and thickness :'(


I was quite surprised that the 'veins' of the leaves were still visible after baking.


As my pie pans do not come with a loose bottom, I lined two stripes of parchment paper at the bottom of the pan. When the pie was done, I tried lifting it out from the pan with the stripes of paper. However, the crust started to crack. In the end, I had to invert the pie onto a plate, and then invert it again onto a serving plate.


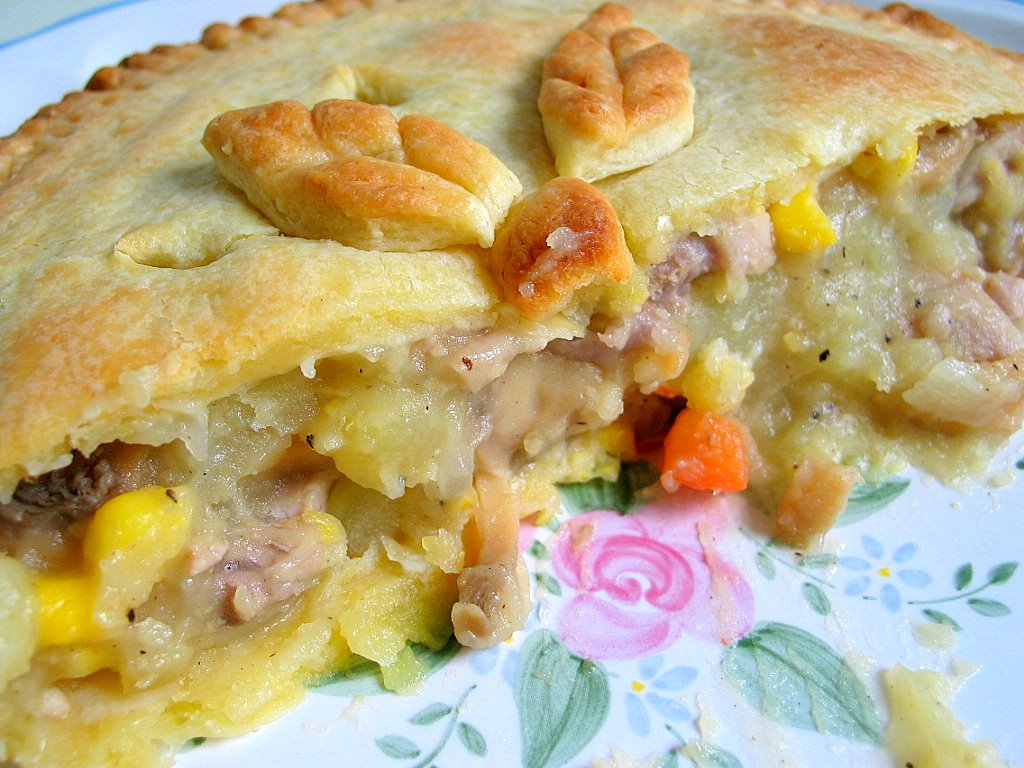
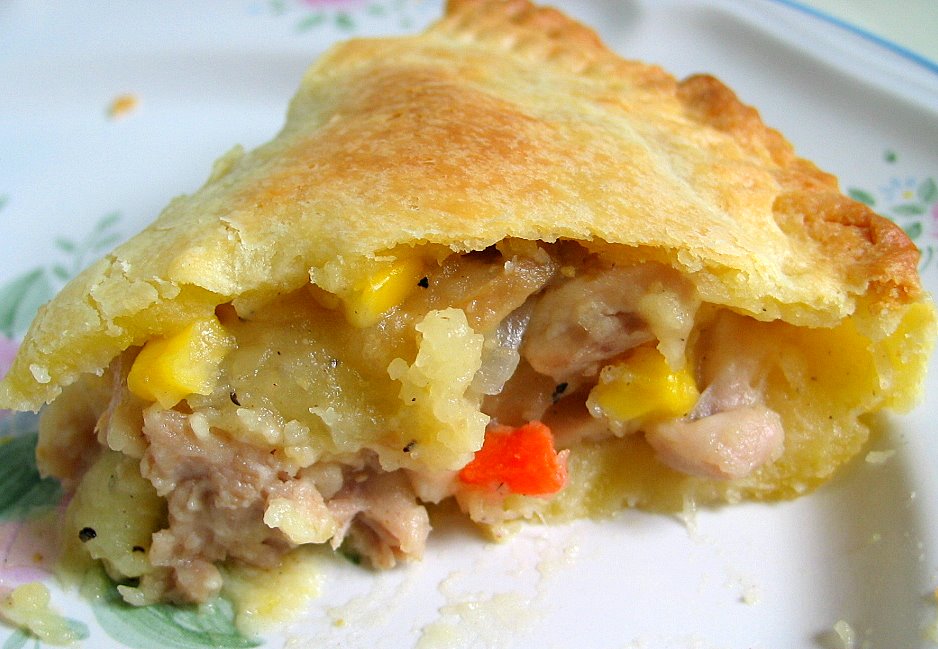
My niece came over for to our place today, and so the four of us each had a quarter of the pie. We liked the buttery, crisp crust very much. It is not overly flaky like a puff pastry, but tasted just right for a short-crust pastry. We have varied opinions about the fillings though. Thanks to my lousy cooking skills, my elder boy and my niece felt that the potatoes were too mushy for their liking...but they like the other stuff in the fillings. Whereas my younger boy and I find the soft and mushy potatoes tasty. The kids had fun trading away the stuff in the fillings among one another!


Upon the request by the kids, I had removed all the green peas from the mixed vegetables...all the 3 of them hate peas! So there is not a single green in the pie!


This is the other smaller pie I reserved for my better half. Since there were no extra dough, I didn't manage to decorate the top of this pie. I was glad that he liked it. He ate 3/4 of the pie right after dinner...and he liked the mushy potatoes fillings too :D

Taken from Happy Home Baking

Friday 2 September 2011

Chocolate Cake


Ingredients:

  • 2 cups white sugar
  • 1/2 cup shortening (or butter)
  • 2 eggs
  • 3/4 cup unsweetened cocoa powder
  • 1 cup milk
  • 2 cups all-purpose flour
  • 1 1/2 teaspoons baking powder
  • 1 cup hot, brewed coffee
  • 2 teaspoons baking soda
  • 2 1/2 teaspoons vanilla extract (or 1 vanilla bean)

Method:

Preheat oven to 350 degrees F (175 degrees C). Grease and flour one 9×13 inch baking pan.

Put the shortening (or butter) into your mixing bowl…

shortening

…and beat until fluffy.

shortening

Pour in the sugar about 1/3 cup at a time and beat until light and fluffy. (This step is often referred to in cake recipes as ‘creaming the sugar and shortening’.)

add sugar

 Add the eggs one at time…

add egg

…and mix well.

add egg

Do not overbeat. When you reach this consistency, it’s time to stop beating.

fluffy

Stir in the dry ingredients (cocoa, flour, baking powder, baking soda) alternately with the wet ingredients (milk and vanilla extract) a little at a time, approximately about 1/3 cup each time.

wet & dry

 Make sure you scrape down the sides and bottom of the mixing bowl every once in a while using a spatula.

scrape

If you have some vanilla beans on hand, split the vanilla bean open with a knife, taking care not to cut all the way to the other side.

vanilla bean

Open up the bean and scrape out the creamy black gold hidden inside, using the back of a small knife…

scrape the vanilla bean

…and put it into the batter.

vanilla

Don’t throw away the used vanilla bean. Chuck it into your sugar pot to make your sugar wonderfully vanilla-scented. Vanilla-scented sugar is absolutely delightful with tea!

For the boiling coffee which the recipe requires, what I do is take a Pyrex (glass) measuring cup, put in a cup of water inside, then add some instant coffee. I then put it inside the microwave. Once it has boiled,  I take it out and pour it into the batter…

add coffee

…and mix using a spatula until just combined.

mix with spatula

Pour the batter into the prepared pan.

pour the batter

Bake at 350 degrees F (175 degrees C) for 30 to 35 minutes or until a toothpick inserted into the cake comes out clean. Do not overbake so as to keep the cake moist and soft.

Allow to cool for about 5 minutes before taking out from the pan. Allow to cool completely on a cake rack before decorating with icing.

Quick icing option: melt some cooking chocolate and spread all over the cake, then decorate with coloured sprinkles and/or chocolate chips.

All ingredients follow the original recipe at AllRecipes.Net. It’s only the method that I’ve modified. The original instructions simply read:-

  1. Preheat oven to 350 degrees F (175 degrees C). Grease and flour one 9×13 inch baking pan.
  2. Cream the sugar and shortening together until light and fluffy. Add the eggs and mix well. Stir in the cocoa, milk, flour, baking powder, boiling coffee, baking soda and vanilla extract. Mix until just combined. Pour the batter into the prepared pan.
  3. Bake at 350 degrees F (175 degrees C) for 30 to 35 minutes or until a toothpick inserted into the cake comes out clean. 

Tips For Making The Perfect Cake:-

  • Cake-decorating may be an art but cake-making is a science. Measure/weigh your ingredients carefully. If you watch cooking shows on TV, chefs like Michael Smith and Jamie Oliver may wing it when cooking stews and soups, but when it comes to cakes, they take out their measuring cups and weighing scales and use the exact amount of ingredients required for the recipe.
  • All ingredients must be at room temperature. Take out your butter, milk and eggs from the refrigerator some 15-30 minutes prior to mixing so that they can be at room temperature by the time you start making your cake.
  • When measuring your ingredients by cup or tablespoon/teaspoon, level the ingredient using a knife or the handle of spoon. Do not press down the flour/sugar/baking powder/baking soda. Do not shake the cup to make the flour settle.
  • Always preheat your oven, at least 15 minutes before putting in the cake. I usually turn on the oven just before I start mixing the ingredients together.
  • If the recipe asks you to grease and flour a pan, do so before you start mixing the ingredients. This way, you can straightaway pour the batter into the pan right after you finish mixing the ingredients.
  • Mix in one direction. My mom has taught me to do this ever since I was a little girl and I’ve always done this. I’m not sure what the reason for this is, but come to think of it — all stand mixers only mix in one direction.

Stir-fry Chicken with leeks


As you all probably know, I have not been posting regularly lately. I am as real as you can get. I am just a regular mom juggling with regular daily chores, evolving around my regular routine and sometimes, yeah, sometimes get to grab a cup of coffee with some close friends then off again to fetch the kids. Life seems to be a never ending cycle. It takes real courage to step back to re-evaluate what we do and why we do it. I am not a super-mom like some of my friends who can sail through motherhood and would do it all over again if given an opportunity. ‘Being a Mother’ to me is tough work. There are always sacrifices to make and promises to keep and sleepless nights when kids are sick. Life has been really just plain tiring until I step back and look at life from the Bible’s point of view. I can do everything through Christ who strenghtens me. Not by might, not by power but by my Spirit says the Lord.

All that I have today and all I can do belongs to the Lord including all my recipe posts and photographs that comes with each post. Prayerfully you are all blessed by the recipes and do keep on trying them to keep the recipes alive for our children and grand children and many more generations to come.

Ingredients

1/2 a large free-range chicken (chopped into small pieces)

3 tsp fermented whole soy beans (can be substituted with Japanese miso)

1 large organic leek (sliced slanted)

4 bulbs garlic (minced)

dark soy sauce

light soy sauce

1/4 tsp of fine sugar

white pepper

sea salt

olive oil

  1. Heat up a wok, drizzle in some olive oil. Toss in the fermented soy beans and garlic. Add in the chicken pieces and stir-fry evenly.
  2. Drizzle in some dark soy, light soy, sprinkle of sugar and a few dashes of pepper. Stirring the chicken as the seasoning is added. When the chicken is almost cooked, toss in the sliced leeks and stir some more.
  3. Add a little water or chicken stock if available. Let the leeks and chicken simmer together for a little while. If you want more soupy gravy like the above, just add more stock or water and sea salt to taste. If you like thicker gravy, just add a Tbsp of cornflour with 3 Tbsp of filtered water, then pour into the simmering dish. This will thicken the gravy.
Taken from audrey cook